The job of conducting industrial inspection tasks, such as taking highly accurate height measurements of an object, measuring protrusion of embossed patterns, is usually given to expensive and time-consuming 3D systems. But Euresys has a cheaper and more flexible solution which is available right now. Yuzairee Tahir, VP sales and support APAC from Euresys, takes a look at how 2D vision engineers can have 3D at their fingertips.
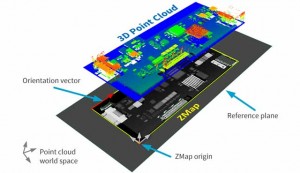
The machine vision fraternity knows that it is a complex and computer intensive job to use a 3D point cloud to solve industrial inspection tasks. Yet what the team at Euresys understand, is that most 3D inspection problems can be solved using a 2.5D representation. What’s more, 3D sensors usually only generate a 2D array of heights and distances. This is where the Easy3D library product from Euresys steps in. Easy3D is a set of software tools which enables the development of 3D machine vision inspection applications. In this role, it provides functions to generate ZMaps which are an effective and very flexible way to deal with 2.5D data. A ZMap is the projection of a point cloud on a reference plane, where distances are stored as pixel grey scale values. Importantly, ZMaps are distortion free, with a metric coordinate system. Easy3D exposes functions to convert arbitrary 3D data like point clouds to 2D representations, which form the ZMaps.
A ZMap is an array of real-world distances, which are generated from a point cloud. The data in the ZMap are calibrated, so distances, heights and angles can be measured in metric units, or pixels. Each value of a ZMap represents the distance from a 3D point to a reference plane ( see illustration above).
The reference plane can be set explicitly, or calculated from the 3D point cloud, and thus has an object levelling ability (see illustration below).
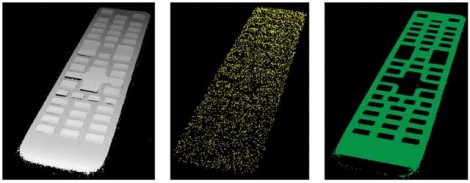
And ZMaps are compatible with Open eVision 2D operators.
For example, pattern matching with EasyFind, or EasyMatch; object segmentation with EasyObject; or, subpixel measurements with EasyGauge. And it means that by using ZMaps with well-known and fast 2D operators, the user has access to an effective 2.5D processing pipeline.
Open eVision can be used alongside several 3D computer vision libraries, including: Easy3D, Easy3DLaserLine and Easy3DObject.
To provide an example of how it works, illustrations below show how the various methods are used to measure hole diameters. 3D levelling is conducted via EPlaneFinder, ZMaps are generated, pattern matching is used for holes detection and holes diameter metric measurement is used in conjunction with EasyGauge.
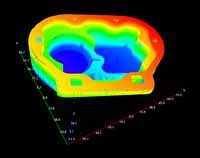
The applications for such technology are wide and include the electronic manufacturing and general manufacturing industries. 3D scan to the right is a 3D point cloud 1 (courtesy of Direct Dimensions).
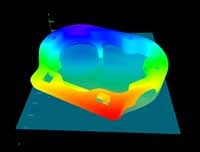
ZMap reference plane 1
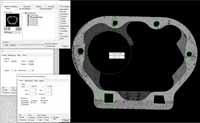
EasyGauge on ZMap 1
The result is a more cost-effective solution which can, depending on application, be up to 20 times faster than conventional 3D systems. And it is a system which is finding many fans in the machine vision industry.
Please contact sales@euresys.com for more information.










 Back to Products