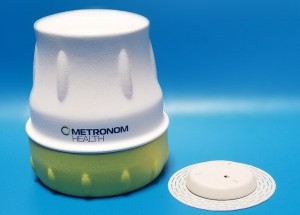
Founded in 2010, Metronom Health is an early-stage medical device company, focusing on developing an innovative, opto-enzymatic continuous blood glucose monitoring technology for people living with diabetes. Metronom's proprietary technology is believed to provide very significant improvements over available Continuous Glucose Monitoring (CGM) technologies, in terms of accuracy in the hypo-glycemic range, reliability, user friendliness, with lower pricing to encourage broader adoption and easier insurance coverage. The company is now at a turning point in its short history, leveraging a sharp focus on engineering and R&D for development of a CGM product that supports the needs of users, as well as the people caring for them.
During the development process, Metronom recognized the critical role of metrology in both R&D and production quality control for its CGM. When working at a scale that is difficult to image with traditional microscopes, Metronom found that leading 3D optical metrology specialist ZYGO was able to provide the clarity that it is looking for, with features like 3D height mapping and resolution capabilities that were more quantitative and deterministic than traditional microscopes. Metronom also found that ZYGO’s metrology tools were a key enabling technology that helped to drive their product innovation by providing valuable process and component information using data collection that was easily configurable and flexible.
Manufacturing and metrology challenges
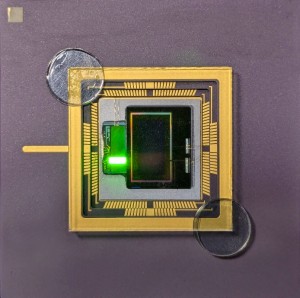
Metronom Health’s Continuous Glucose Monitor (CGM) is based on opto-enzymatic technology instead of the typical electro-chemical CGMs. At the heart of the technology is a sensor that consists of an oxygen sensitive polymer at the end of an embossed fiber-optic waveguide. The oxygen sensitive polymer changes in fluorescence lifetime as the glucose oxidase enzyme consumes glucose and oxygen in a microscopic reaction chamber. This approach allows Metronom to deliver improved accuracy with a higher signal to noise ratio in the tissue, a built-in quality system right at the sensing site plus additional safety and device-prompted calibration that is derived from a differential oxygen measurement, and a CGM solution that does not have interferences with common medications such as acetaminophen that can challenge electro-chemical methods.
In addition, Metronom’s technology is well suited for high-speed, high-volume manufacturing, which presents opportunities for significant cost advantages compared to existing CGM technology.
Daniel Bartholomeusz, Director of Process Engineering at Metronom says, “Despite — or perhaps because of — the obvious advantages of our CGM technology, there are some manufacturing challenges, and also some challenges specific to metrology. In terms of manufacturing per se. We had a difficult time measuring the high aspect ratio and surface roughness of the embossed optical micro-structures. It was difficult to measure the depth of laser-cut blind hole features in clear polymers, and fill heights of clear chemistries in clear polymers. We needed to use metrology tools that combined high functionality with ease-of-use, cost-effectiveness, and that were speedy and scalable. We found that in all respects, ZYGO tools gave us what we needed.”
Chosen metrology solutions
The specific metrology tool used by Metronom was the ZYGO NewView 9000 3D optical surface profiler, which makes it simple and quick to measure a wide range of surface types, including smooth, rough, flat, sloped, and stepped. All measurements using the NewView 9000 are non-destructive, fast (improving productivity and process control), and require no sample preparation. At the core of the system is ZYGO's Coherence Scanning Interferometry (CSI) technology which delivers sub-nanometer precision at all magnifications and measures a wide range of surfaces.
Bartholomeusz continues, “The selection criteria when choosing the metrology solution that best matched our application requirements were quite stringent. It was important that XY resolution was ≤5 microns, pixel resolution was ≤2 microns, and surface topography repeatability was ≤1 micron. In addition, it was important that the solution that we selected had 2 surface measurement capability, and could measure transparent materials. We also required 50 x 150 mm XY travel and Z travel of ≥ 5 mm. In terms of ease of use, it was important that the system provided plane leveling, programmable movement control, feature recognition, pass/fail output capability, cross section tools, auto-step height measurement tools, and was capable of image stitching. Finally, we needed a system that could be delivered quickly, was as close to a turn-key solution as possible with local service support, and required minimal training time. And as to scalability, we needed fast scan rates. NewView 9000 provided all of this.”
Whether used in the lab or in process, Metronom identified some significant advantages that the NewView 9000 had over alternative technologies. The broad range of capabilities of the NewView 9000 allowed the company to characterize surface roughness on optical elements, depth of features and cross-sectional characteristics for laser cut elements, and film thickness for measuring excess waveguide resin fill.The resin fill application proved truly impressive by dramatically outshining competing solutions and surpassing expectations both in the lab and production development. The company also used interferometer scans to assess chemistry fills and to measure blind-hole laser cut features.
The system also allowed the comparison of 3D measurement data to 3D CAD data, and the measurement of micro deposits of chemistries. For production, Metronom was able to 3D scan map, which allows for XY measurements at specific depths with much greater accuracy than focusing with a light microscope measurement system. Also, automated and simple python scripts enabled fast reliable scans over a large surface. Critically, the company could also measure heights of clear surfaces, and produce valued program automated data collection with electronic reports for quality records.
Bartholomeusz concludes, “The selection of the right metrology tools for our exacting CGM technology has been fundamentally important, and has been key to our success. ZYGO’s NewView 9000 has enabled so much in our product development program, and has led to the creation of optimized and innovative product features. The NewView 9000 ended up being scalable and it is a comprehensive and robust system that can be used in production environments. It has truly been a pivotal technology for Metronom.”
Eric Felkel, Product Manager (Optical Profilers), Zygo Corporation.
.










 Back to Enlightening Applications